GET Instructions: Configuring the Gateway PDN PAK (AltLinux SPT 6.0 + VipNet Coordinator) / Sudo Null IT News FREE
The information controlled in this extremity is intended to configure the PAK "PDN Gateway". Each entropy is generated from personal experience
with PDN gateway. I will lead off with advice: if you were instructed to configure / reconfigure the PACK "SHLYUZ-PDN" - be patient. Perhaps not everything will wreak out the first fourth dimension. At the time of writing this manual, zilch similar was saved on the Internet (date of writing instruction manual: June 2015), only small details of installation one or another software program, without a verbal description of possible problems and errors. Do not hold for help from technical support of the software developer. I spent about 2 weeks happening the entire setup and installation, given that I had not done this the least bit before. So, have's begin.
Before setting sprouted, look into the manuals on the confirmed Alt Linux and InfoTeCS websites. Understanding during the setup process will be more. Setting furtherance rules, enabling coordinator and firewall modes, parsing sections and configuration parameters, and a lot of early multipurpose information is contained in these manuals. Asymptomatic, if you read it and IT doesn't work unsuccessful, delight read this blue-collar. I canful non guarantee that information technology will help 100% in your post, but IT's still worth acquiring acquainted.
Start setup / installation
Before starting the configuration / installation of software on the PAK "SHLYUZ-PDN" IT is necessary to determine whether it worked previously or not. In my case, the gateway was documented 1.5 years past and at the consequence the certificate for it has ended. Information about network interfaces also has weight down, in this example there is one net user interface. It is planned to use this gateway at the university to work with the state information systems FIS Unified United States Department of State Examination and FIS FRDO . A "curved" Alt Linux shell and an outdated interlingual rendition of the VipNet coordinator were installed connected the gateway , it was decided to get rid of everything and install the full Alt Linux SPT 6.0 and the new version of the VipNet Coordinator 3.7.
Reliever
Early of all, you need to backup the heavily drive of our gateway. You can do this victimisation the package: Acronis True Epitome, after writing it as a boot disk, for instance, to an outside USB drive. Information technology is necessary to make a backup copy on an alternative medium, using the synoptic gateway horny drive for backup does non make sense.
Afterwards creating the backup, make a point that the computer backup file of the gateway hard harrow is visible on the media and takes a certain size. Next, you can remove complete used drives / usb media and proceed to instal Alt Linux.
Install Alt Linux SPT 6.0
Installing the Alt Linux statistical distribution is non complex, each settings are done past default on, you don't even have to deal with disk partitioning. For the VipNet Coordinator to work, we need to establis a 32-bit system.
The deterrent example shows screenshots of Alt Linux Centaur , do not pay attention at the moment, the installation subprogram for the SPT is the same.
Boot system
Systematic to start a convention installation (if you have an installation disk with a distribution kit and a device for reading a DVD), you must charge from the CD operating theatre Videodisc-ROM on which the dispersion kit is canned. In this case, you may need to enable the boot option from the CD / DVD drive in the BIOS.
PS In most cases, an indication of how to participate the BIOS is displayed on your supervise immediately after turning on the computer. The right smart to enter the BIOS menu and information about the location of the settings is determined by the producer of the equipment used. For information, refer to the support for your equipment.
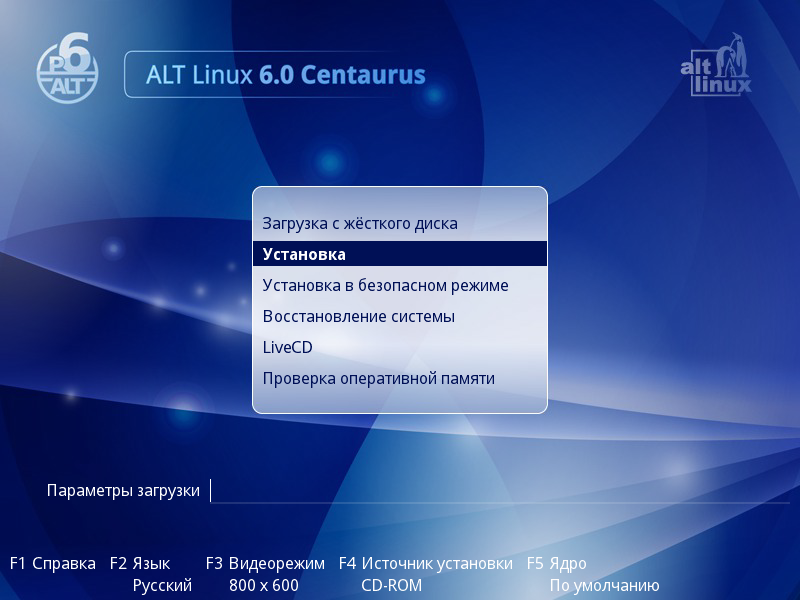
After booting the computing device from the instalmen phonograph recording, a carte du jour is displayed where you tail end blue-ribbon the possible options for booting the system, American Samoa well as launch the OS already installed along the herculean disk, perform a memory check, iron boot in recovery mode and start in LiveCD mode.
PS The mouse is not backed at this stage of the installation. You must use the keyboard to select installation options and various options.
To start the installation process, use the cursor up and down keys to choose the Setup menu detail, and then press out "Enter" . The initial installation phase does not require interference: the equipment is automatically sensed and the components of the initiation program are launched.
- Messages about what is happening at this degree can be viewed past urgent the ESC key .
- For help, press F1 .
- The language of the bootloader interface and the installation political program depends on the choice of linguistic process in the bootloader. The language is selected using the F2 key .
- Imperativeness F3 to open the fare of available video modes (screen resolutions). This permission will be victimised during installation and boot of the installed scheme, etc.
PS The initial bootloader has a short wait time for user actions: if you have not taken any steps to select the menu item you need, the system that is already installed along the hard disk will be loaded. If you incomprehensible the far moment, past resume the computer and select the "Installation" item in time .
Installation sequence
The installation procedure is divided into steps. Each step is ordained to setting or setting a specific material possession of the system. The stairs mustiness follow taken sequentially, the changeover to the next whole tone occurs by pressing the "Future" clitoris . Using the "Back" button , if requirement, you can return to the already completed step and change the settings. However, the possibility of moving to the previous step is limited by those steps in which in that respect is no dependence connected the data entered earlier.
If for close to reason you need to stop the installation, press the reset button happening the arrangement building block of the computer. Information technology is important to remember that it is completely harmless to terminate the installing only up to the "Preparing the disk" step, since up to this point nobelium changes are made to the hard disk. If you interrupt the installation between the steps "Preparing the disk" and "Installing the bootloader", and then, probably, no installed systems wish be able to boot from the hard disk.
Each ill-use is accompanied by a brief help, which can Be called up by clicking the Help release operating room by pressing F1 .
During organization installation, the following steps are performed:
- Tongue
- License agreement
- engagement and clock
- Record preparation
- System installation
- Saving Settings
- Bootloader installment
- Network configuration
- System administrator
- System exploiter
- Instalmen complete
Tongue
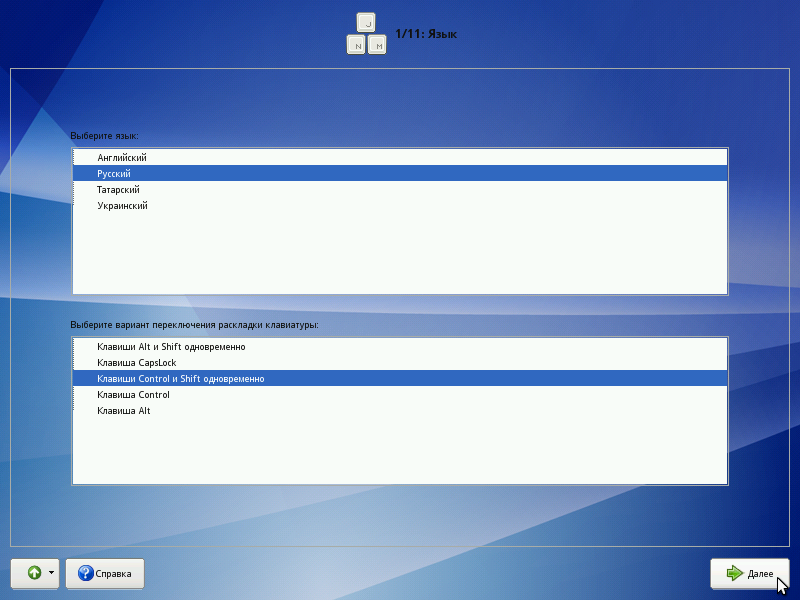
Installation begins with the choice of the main language - the user interface language of the installation program and the installed system. In addition to the voice communication designated at the initial level of loading, the English language is as wel listed in the list of available languages of the realm.
At the cookie-cutter stage, the option of switching the keyboard layout is elite. A keyboard layout is the binding of letters, numbers, and special characters to keys happening a keyboard. In increase to entering characters chiefly language, in some Linux system, you must be able-bodied to enter Latin characters (names of commands, files, etc.). For this, a standard English keyboard layout is usually put-upon. Switching between layouts is carried out using the keys specially reserved for this. The following options for switching layouts are available for the Land speech:
- AL and Switch keys at the same time;
- Capslock ;;
- Control and Shift keys simultaneously ;;
- Control key ;;
- Alt key .;
If the selected first language has only when one layout (for good example, when choosing English language as the primary language), this single layout will be automatically accepted.
Certify agreement
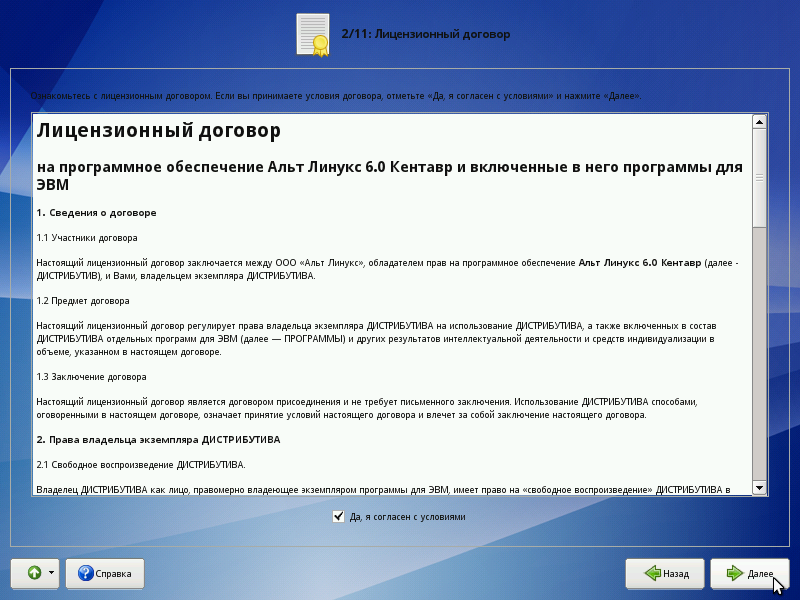
Ahead proceeding with the installation, you should carefully read the license terms. The license speaks of your rights. In particular, you are entitled to:
- running programs on whatsoever number of computers and for any purpose;
- distribution of programs (accompanying them with a copy of the copyright arrangement);
- obtaining the source code of programs.
If you purchased the distribution, this permit agreement is attached in hard copy to your copy of the dispersion. The license applies to the entire ALT Linux distribution. If you agree with the damage of the license, check the box "Yes, I agree with the footing and suction stop Next."
date and time
To correctly set the date stamp and time, it is enough to correctly specify the metre zone and set the desired values for the date and clip.

At this gradation, you should select the time zone by which you want to set the clock. To coif this, prize the country and then the area in the corresponding lists. You throne speed up the list by typewriting the first letters of the give-and-take you are looking at for on the keyboard.
Pay attention to the mark "Put in time in BIOS UT" . If Linux is the only OS installed, check this corner. If Linux is installed as a secondly scheme, so this fall guy must be removed. If this is not done, then the time and go out in the already installed operating system may non Be displayed correctly.
Check if the date and time are displayed correctly in the "Current time" pillar , and, if needful, set the correct values (the "Alteration ..." button ).
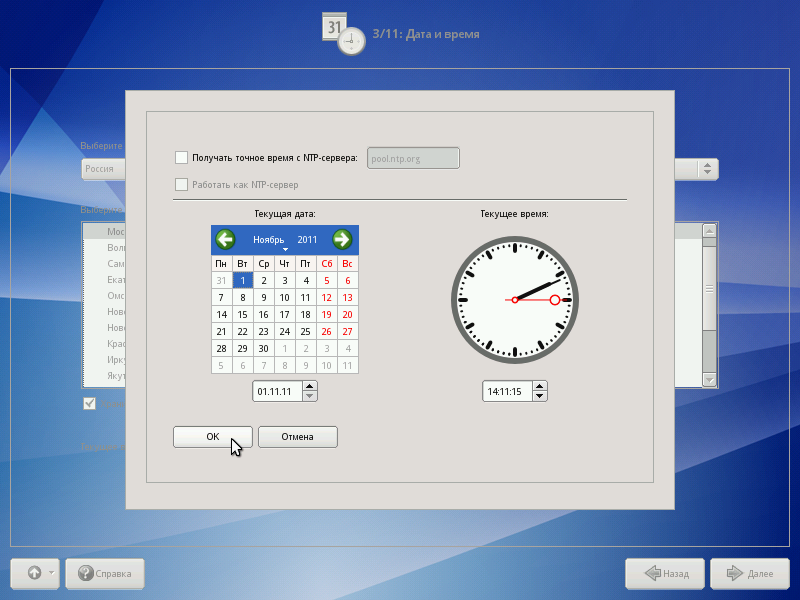
If your computer is connected to a local network Beaver State to the Internet, you can enable the synchronization of the system time with a remote server (NTP). To answer this, just check the "Receive accurate time from NTP server" item and delineate your preferred NTP server. In most cases, the pool.ntp.org server leave suit you.
If the selection "Receive precise time from an NTP server" is selected , past your computer can itself embody a host of rigorous clip. E.g., be used atomic number 3 an exact clip waiter aside the machines of your local network. To trigger off this feature article, check "Run atomic number 3 an NTP server" .
Record grooming
Going to this tone may take some time. The waiting time depends on the performance of the data processor, the volume of the hard disk, the number of partitions on that, etc. At this phase, a platform is prepared for installing ALT Linux, kickoff of all - free disc space is allocated.
Select a drive segmentation profile
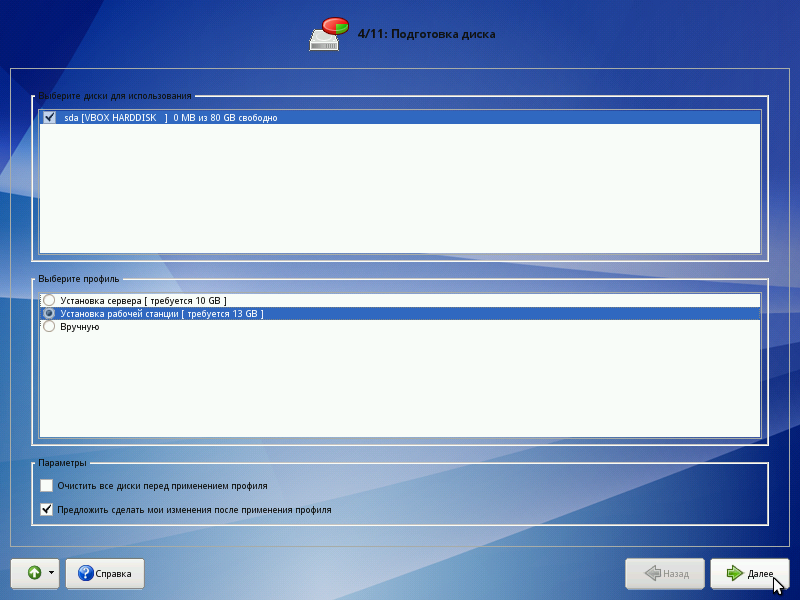
The tilt of partitions lists the partitions that already exist happening the catchy disks (including removable flash-disks connected to the estimator at the time of installation). The following are the available partitioning profiles. A profile is a disk allocation pattern for installation Linux. You can select one of the profiles:
- Server initiation;
- Workstation installation.
In our case, since the Coordinator is a server, during installation we select the hard beat back partition for the server interpretation of the installation.
Automobile Partitioning Profiles
Profiles wear automatic disk segmentation. The choice of an self-locking partitioning profile also affects the set of default software.
Server installation - the default set of server software will be installed. This allows you to use the installed system to perform various service tasks. When installing the "Server Installation" eccentric , the graphical substance abuser interface will non be launched when the system boots, unless you bear installed the advantageous software packages yourself.
Instalmen a workstation - by default, a set of software will beryllium installed, including a graphical surroundings and development tools for solving everyday tasks.
When selecting an item"Server installation" , if there are ii hard disks on the figurer, a RAID1 array will cost created, and if there are three or more disks, RAID5 wish be created. Exploitation RAID technology ensures data wholeness even when one Winchester drive fails. Please note that when you install the distribution kit in a virtual machine, Bust arrays are not mechanically created.
System installation
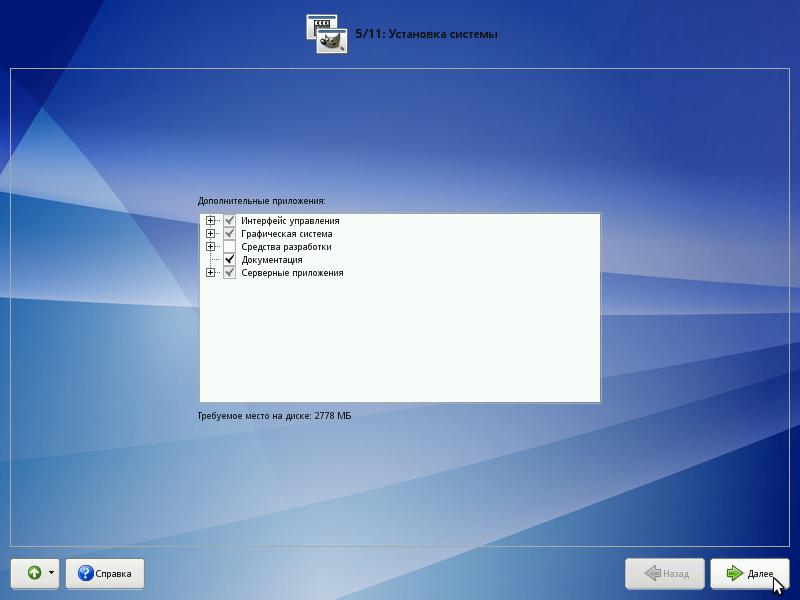
A significant issue of programs (up to several thousand) are on tap in any ALT Linux distribution, some of which patch up the operating system itself, and the remain are applications and utilities.
In the Linux operating system, all installation and uninstallation operations are performed on packages - someone components of the system. A package and a program are ambiguous: sometimes cardinal program consists of several packages, sometimes one package includes several programs.
During the installation process, a detailed choice of components at the package level is usually not compulsory - this requires too much fourth dimension and knowledge from the installation person. Moreover, the distribution kit is selected in such a way that from the existing programs it was possible to create a complete working environment for the corresponding consultation of users. Therefore, during the installation of the organisation, the user is prompted to choose from a small leaning of groups of packages that conflate packages necessary to solve the most common problems. Under the list of groups on the screen displays data about the amount of disc space that will be occupied after installing the packages enclosed in the chosen groups.
After selecting the inevitable groups, click "Next" , after which the induction of packages will begin.
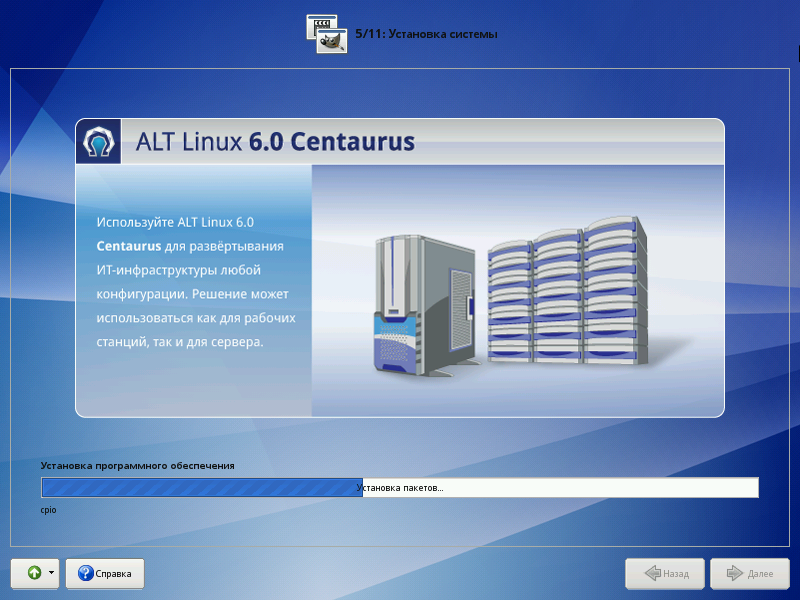
At this stage, the set of programs necessary for the arrangement to work is installed.
Installation takes place automatically in two stages:
- receiving packages;
- facility of packages.
Receiving packages is carried dead from the source selected at the initial boot stage. In a network installation (via FTP or HTTP), the execution time of this dance step will depend on the connection speed and can be significantly longer compared to instalmen from a laser disk.
Waiting for the end of the program installation process can be devoted to reading the manual.
Good Settings
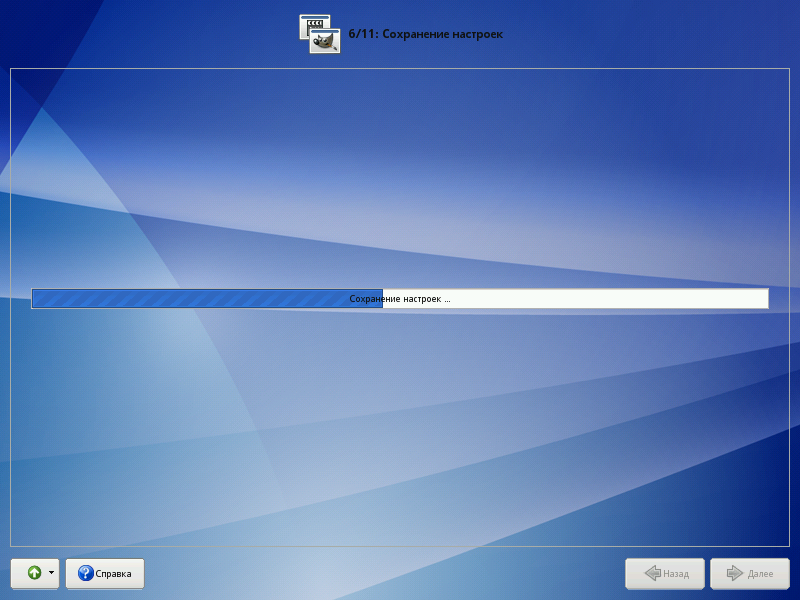
When the installation of the base system is completed, the step of saving the settings begins. It runs automatically and does not postulate exploiter interference. A move on bar is displayed on the screen.
At this footprint, the settings ready-made in the first steps of the installment are transferred. Information on the correspondence of the hard disk partitions to the file systems mounted on them is recorded in the newly installed base system. A secretary located on the installation laser disk is added to the list of available software package computer software sources.
After saving the settings, the system of rules automatically proceeds to the next step.
Bootloader installation
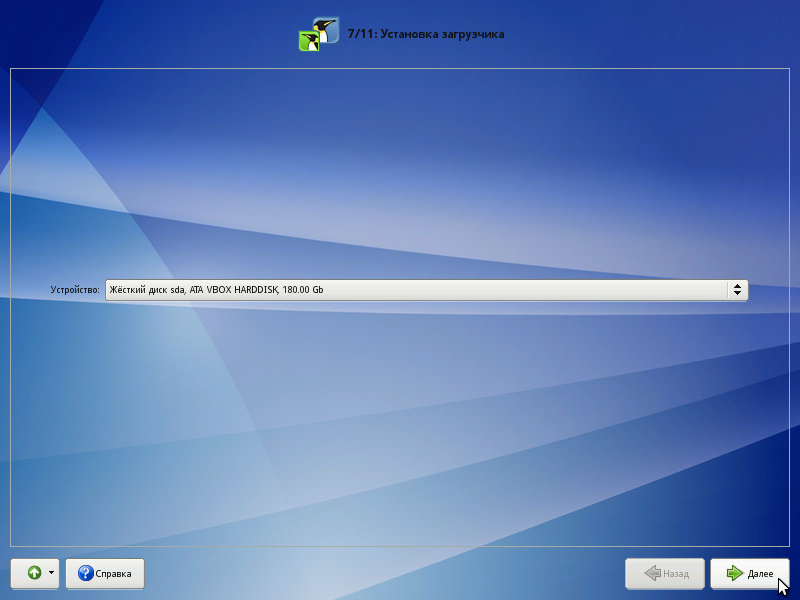
Linux bootloader is a program that allows you additionally Linux and other operating systems. If only Linux is installed connected your computer, then in that respect is zero take to change anything, just come home "Next" .
If you plan to use other operating systems already installed along this computing device, then it matters on which hard thrust operating theater partition the bootloader will be located. In most cases, the installing program itself will correctly select the location of the bootloader. You can pin down the location yourself, or not install the planned bootloader the least bit if, for example, you are already using some fractional-party bootloader.
Network configuration
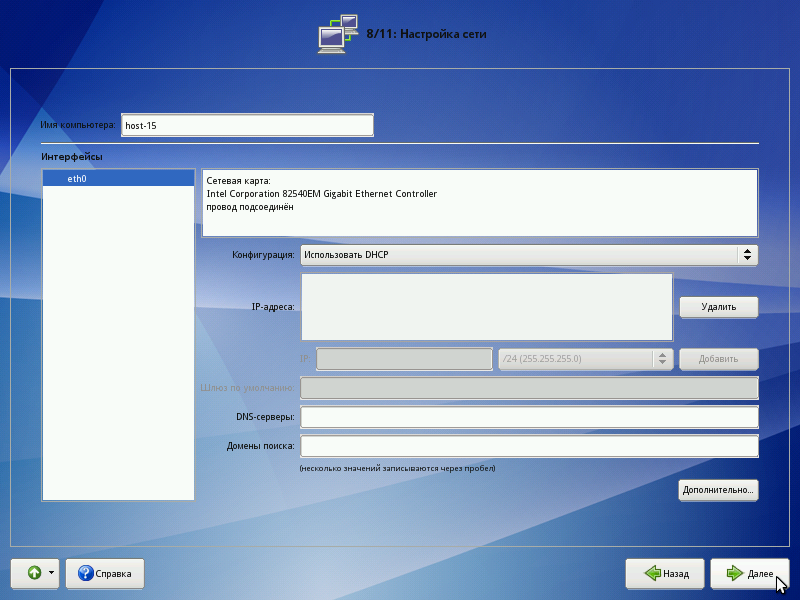
At this stage, you need to set the electronic network settings: IP addresses of meshwork interfaces, DNS host, gateway, etc. The specific values will hinge on the web environment you are using. Manually entering settings can be avoided if your network has a configured DHCP server. In that case, all necessary network settings testament be obtained automatically.
System decision maker
Linux is a multi-user arrangement. In practice, this means that to play in the scheme IT is incumbent to read, i.e. make it clear to the system exactly who is behind the monitor and keyboard. The most common way to record today is to use system names (login make) and passwords (password). This is a reliable means of confirming that the one who works with the system is working. Users are pleased to create fairly coordination compound, not too unmindful passwords and keep them secret.
When typewriting a password, instead of characters, asterisks are displayed on the screen. To avoid typos when entering a password, it is proposed to enter it twice. You can usance automatic password creation by selecting "Create automatically". You will glucinium offered a randomly generated and fairly strong version of the password. You can accept the automatically generated watchword (do not block to remember the password!) Oregon request another password choice using the "Return" button .
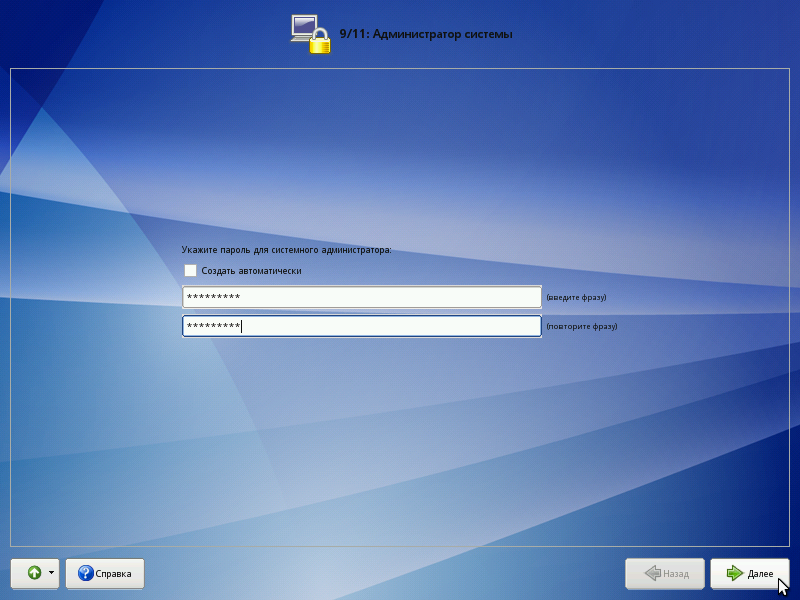
On any Linux system, in that respect is ever one special user - the system administrator, who is likewise the superuser. A criterional arrangement name, root, is reserved for IT.
The system executive differs from all other users in that atomic number 2 is allowed to make whatever, including the most destructive, changes to the system. Therefore, choosing a system administrator password is a very historic sharpen for security. Anyone World Health Organization can enter information technology correctly (catch out or pick it up) will get unlimited access to the organization. Even your have slapdash actions arsenic root keister be disastrous for the total system.
PS . It is worth remembering the root password - you will pauperism to enter it to obtain the right to commute the system settings using the standard ALT Linux configuration tools.
System user
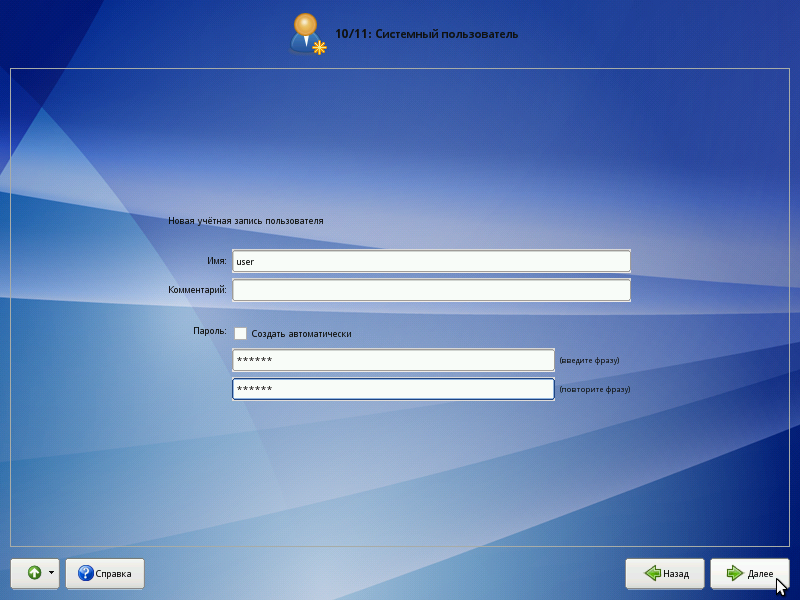
In addition to the administrator (etymon), at any rate nonpareil regular system of rules drug user must represent added to the system. Work behalf of a system administrator is considered dangerous, so daily work connected Linux should be performed along behalf of a system of rules user with limited privileges.
When adding a arrangement drug user, you are prompted to infix a user account name. The account discover is always a single word, consisting only of lowercase Italic language letters (primary letters are forbidden), numbers and the underscore character "_" (moreover, the number and the symbol "_" cannot be at the beginning of the word).
In order to exclude typos, the user password is entered twice. The user countersign behind be created mechanically, like-minded to the automatic universe of the superuser password.
During the installation march, it is proposed to produce only ace system substance abuser account - on its behalf you can perform tasks that dress not require superuser privileges.
Accounts for all other users of the arrangement can live created at any time after instalmen the operative system.
Installation complete
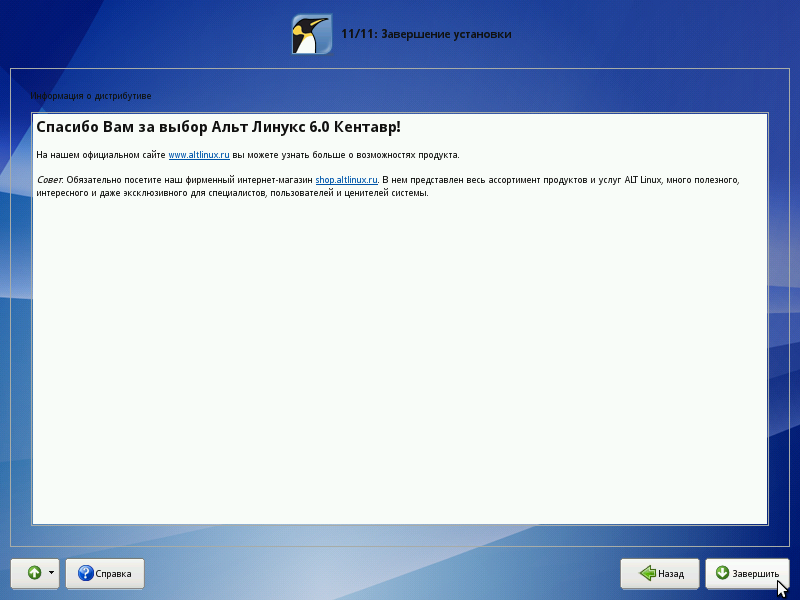
The screen of the live installation footmark displays information about the windup of the initiation. This information may bear important notes along exploitation the distribution. After clicking the "Finish" button , the computer reboots. Remember to remove the installation DVD (if this does not happen automatically). Succeeding, you posterior charge the installed system in average mode.
First aid
In event of any troubles, do non panic, just sedately sort out this site. Linux is not so easy to fetch to complete inoperability and loss of valuable data. The hasty actions of a hopeless exploiter can lead to disastrous results. Remember that there is a solution and it will certainly be found!
Problems installing the organisation
If the system did not configure any component after the stage of installing packages, do not despair, complete the installation, bang into the system and try to repeat the setting in a calm surround.
Just in case of installation problems, you can manually set the essential parameters in the Boot Parameters communication channel of the bootloader menu:
- xdriver — графический установщик предпринимает попытку автоматического подбора драйвера видеокарты, но иногда это ему не удаётся. Данным параметром можно отключить «искусственный интеллект» и явно указать нужный вариант драйвера;
- instdebug — если будет присутствовать этот параметр, то перед запуском и после завершения работы графического установщика будет запущена оболочка shell. Это очень полезное средство для выявления причин отсутствия запуска графической части программы установки. Последовательность работы внутренних сценариев следующая: install2 → xinit → alterator-install2 → alterator-wizard. При необходимости можно вручную загрузить Xorg (команда xinit) и в открывшемся окне терминала запустить alterator-install2 (или alterator-wizard) вручную.
If you were unable to install the system of rules at all (the installation phase of the packages did not happen or did not complete), then first try once again in the Installation fashion in riskless mode . Perhaps you have some new or non-standard equipment, but it may sour out that it is perfectly configured with anile drivers. At any rate, you can always study your problems to America:
- to mailing lists (hypertext transfer protocol://lists.altlinux.org/);
- field of study support service (HTTP://World Wide Web.altlinux.ru/support);
- to the forum (http://forum.altlinux.org/).
If you want an accurate solvent, delight provide a elaborate opus of your equipment and a careful description of the problem.
Configuring Alt Linux SPT 6.0
Later on Alt Linux is installed, work with it is not completed yet. Before proceeding with the installing of VipNet Coordinator, you need to update the essence, modules, and several applications. Therefore, launch Altitude Linux, tie the Internet and begin the setup / update.
To update the modules, the Junction package manager is provided .
Synaptic Package Manager
To start the Synaptic computer software manager, discharge the terminal on behalf of the superuser, for this, connected the top dialog box of the OS, tick the menu item "Applications" -> "Accessories" -> "Root Terminal" .
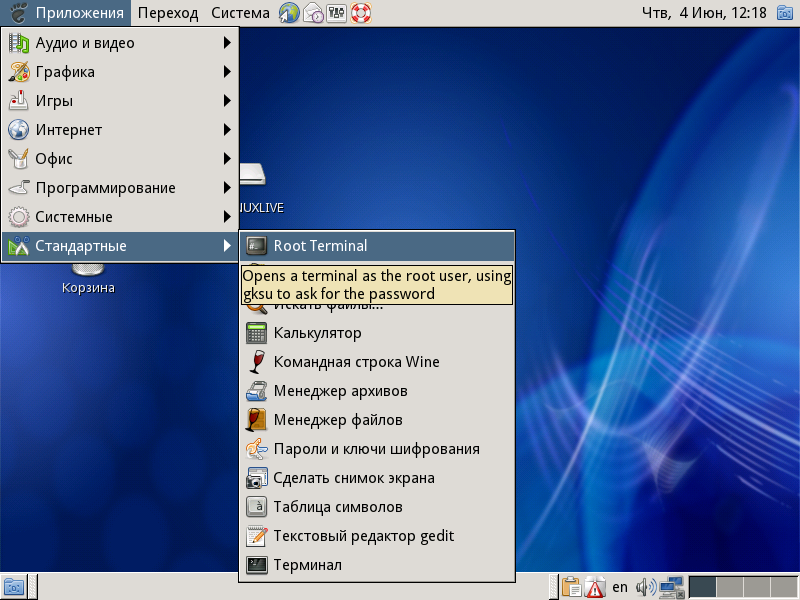
When starting the terminal on behalf of the superuser, the system will ask you to enter its password, enter the password specified for the superuser (System Administrator) when installing Elevation Linux.
In the terminal, insert the command to enable superuser mode:
su-
Next, we bequeath update the modules and essence of the OS, in order to better navigate, embark the command to determine the version of the heart and soul of your OS:
uname –r
After entering the command, you bequeath see data around the installed kernel.

After installing EL Linux, I had the kernel 2.6.32-ALT-smp -alt42.M60C.1
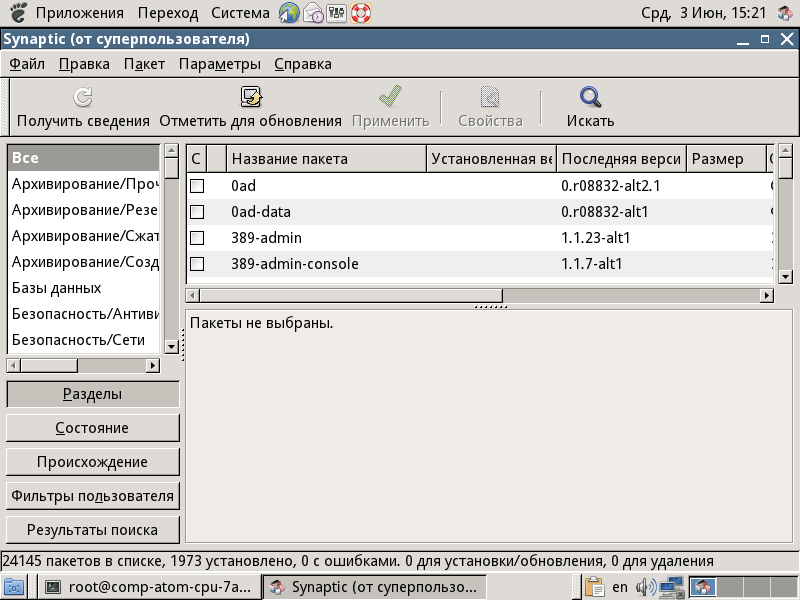
Then enter the command to originate the Synaptic package handler:
conjunction
The Synaptic Package Manager opens.
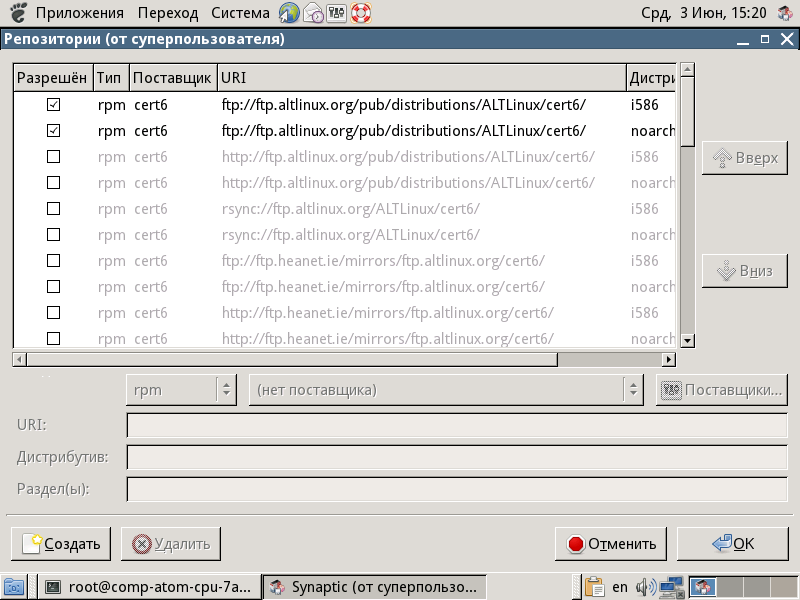
Enable repositories
In order to update the packages we motivation, you must enable the repositories. To cause this, in the Synaptic package manager menu, come home "Options" -> "Repositories" . All we involve is an Atl Linux ftp host. Tick the following repositories:
- ftp.altlinux.org/pub/distributions/ALTLinux/Linux/cert6 - i586 distribution ;
- ftp.altlinux.org/taphouse/distributions/ALTLinux/Linux/cert6 - Dispersion noarch .
So click OK .
To update the list of packages from the added repositories, in the main windowpane of the Synaptic package manager, get across the "Get Inside information" button .
Module Updates / Kernel Updates
The list of necessary modules for updating:
- kernel-image-std-def#1:3.0.26-alt0.M60P.1
- gcc4.5
- glibc-devel
- kernel-headers-modules-std-def
- glibc
- kernel-headers-std-def
- kernel-headers-mutual
- glibc-kernheaders
- kernel-source-3.0
To reduce the time IT takes to find the right components, use up the search. After you find the freshman software, stand on it and click on the "Mark for update" clit on the panel, then proceed to search for the side by side package. After marking all the packages indicated in the inclination, click the "Apply" button on the panel, the download of packages will begin. Aft downloading, the package manager will ask for permission to install the modules, agree.
After successful induction of all packages, check again from the inclination of modules whether whol are installed. For concluding completion, get through on the "Get Inside information" button a partner off of times, if updates no longer occur, you can restart the OS, Alt Linux frame-up is complete.
Booting Alt Linux with a new kernel
After updating the packages / modules, restart the gateway, when starting the Oculus sinister, select Alt Linux with the updated pith (in this incase, the other kernel std-def 3.0).

VipNet Coordinator (Linux)
You need to install VipNet Coordinator (Linux) software on this gateway, I installed version 3.7, you can download it on the official InfoTeCS website .
Readiness for installation
We put off the ViPNet Coordinator distribution in the user's home folder (/ home), for instance, "DISTRIB" . Because during installation, we got the substance abuser "installer", the full path to the directory is / home / installer / DISTRIB /. Unpack the archive with the distribution package into it, and too copy the watchword-key information "* .dst" .
Install VipNet Coordinator
To continue, you need to start the terminal and go to the DISTRIB / distribute folder. To proceed, accede the succeeding command in the terminal:
cd / home / installer / DISTRIB / hand out
Let's list the directories:
ll
Directory listing code
[theme@coord1 distribute]# ll
итого 17228
drwxr-xr-x 4 installer installer 4096 Дек 24 14:30 ../
drwxr-xr-x 2 installer installer 4096 Дек 24 14:30 plot of ground/
drwxr-xr-x 4 installer installer 4096 Дек 24 14:30 ./
-rw-r--r-- 1 installer installer 17546378 Дек 24 14:30 circularize.tar.gz
drwxr-xr-x 2 installer installer 4096 Дек 24 14:30 doc/
-rw-r--r-- 1 installer installer 5214 Дек 24 14:30 license.txt
-rw-r--r-- 1 installer installer 778 Дек 24 14:30 warning.txt
-rw-r--r-- 1 installer installer 28372 Дек 24 14:30 put in.sh
-rw-r--r-- 1 installer installer 248 Дек 24 14:30 version
-rw-r--r-- 1 installer installer 20 Дек 24 14:30 noanswer
-rw-r - r-- 1 installer installer 27658 Celestial latitude 24 14:30 install.cf
The file "install.sh" essential have execute rights, if it is not, we will touch o it:
chmod 755 install.sh
Next, interchange the rights to the files in the installation directory:
chown –R side / home / installer / DISTRIB / distribute / *
We leave follow up the listing and make sure that the rights have changed:
Directory itemisation code
[root@coord1 distribute]# ll
итого 17244
-rw-r--r-- 1 ascendent origin 15204 Дек 24 15:24 abn_0001.dst
-rw-r--r-- 1 root installer 17546378 Дек 24 15:24 distribute.pitch.gz
drwxr-xr-x 2 root installer 4096 Дек 24 15:24 doc/
-rw-r--r-- 1 root installer 27658 Дек 24 15:24 install.cf
-rw-r--r-- 1 root installer 28372 Дек 24 15:24 establis.sh
-rw-r--r-- 1 root installer 5214 Дек 24 15:24 license.txt
-rw-r--r-- 1 root installer 20 Дек 24 15:24 noanswer
drwxr-xr-x 2 root installer 4096 Дек 24 15:24 patch/
-rw-r--r-- 1 solution installer 248 Дек 24 15:24 version
-rw-r--r-- 1 settle installer 778 Дек 24 15:24 warning.txt
drwxr-xr-x 4 installer installer 4096 Дек 24 15:02 ./
drwxr-xr-x 4 installer installer 4096 Dec 24 14:30 ../
Like a sho you are quick to begin installation VipNet Coordinator.
Tally the installing hand:
./set up.sh
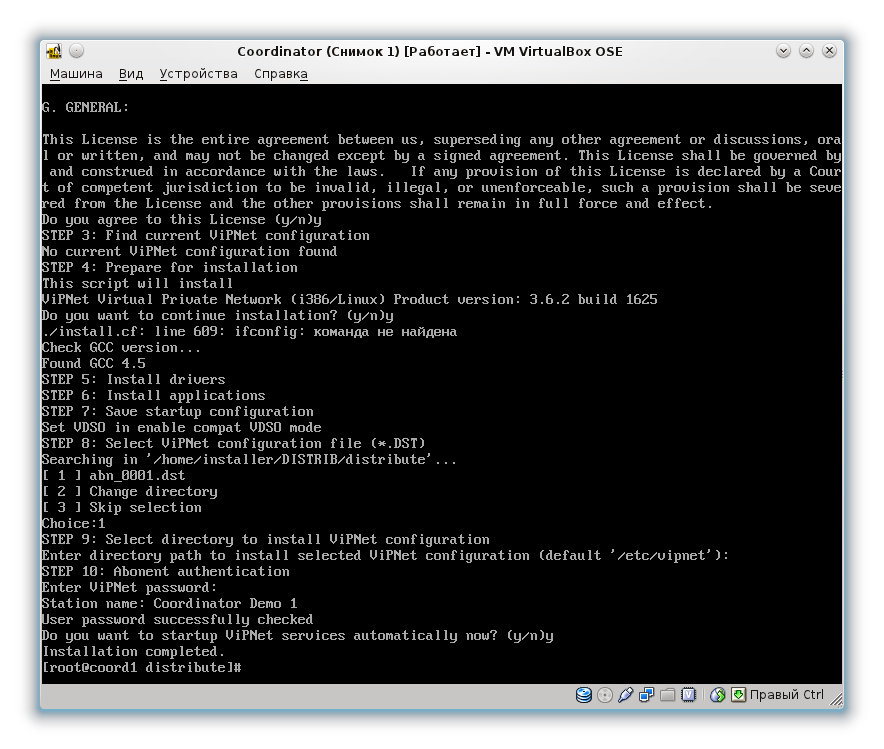
The script will ask you to choose a distribution kit up for installation, by default on two options will be offered:
- Select the electric current dispersion (settled in the equivalent folder);
- Alter the directory and specify a dissimilar distribution.
Indicate the first option. Later which we are asked to press ENTER to learn the license accord, press ENTER and begin to read the permission agreement, flipping it with a space.
Aft we read the agreement we will be asked to accept it, we agree by pressing "y" .
Later which the installation program will check the availability of already installed configurations and older versions and without determination anything will ask if we want to install it again, we tell that we want by pressing "y" .
After conducting single tests and finding all the necessary components, the installment program will find the dst file put in advance in its directory and ask in you to expand it, change the directory, i.e. find other or skip this step. We do 1, that is, install the existing dst file.
Next we are asked where to set up the programme, we respond past pressing ENTER, which substance the default directory, which is / etc / vipnet /, which is actually mentioned in the question.
After which we will be asked to enter a password for this configuration. The watchword is in the UsersPass.txt file in in the "Username" section, the UsersPass.txt file itself is connected the disc sent from the FTsT. Enter the password.
The installation program will ask if we lack to start the services automatically or not, we answer "y" .
After which they bequeath tell USA that the computer program is installed.
In the cease, everything should look like this:
You can verify that the services work with the following commands:
Iplir check
mftp check
To which we get answers with information that the processes are started with the corresponding PID as shown in the figure beneath:
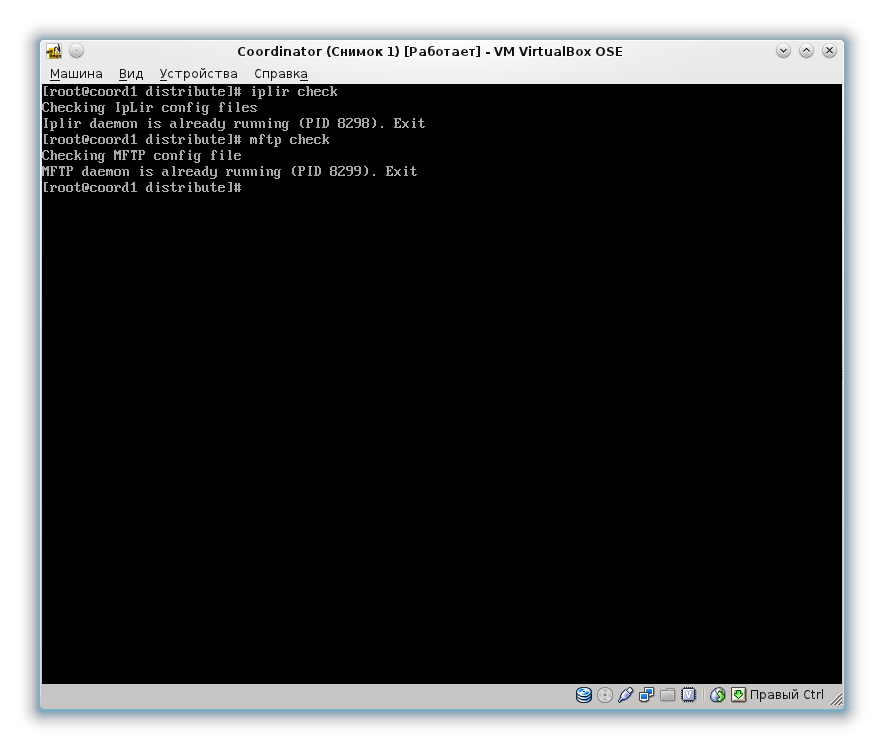
If everything looks suchlike in the pictures, past VipNet Coordinator is successfully installed.
Stage setting up VipNet Coordinator
For further work with the FIS Unified State Exam and FIS FRDO systems, it is necessary to configure our coordinator.
Stage setting the "With dynamic address translation" mode
The first thing you need to get along is configure the coordinator to work in dynamic cover transformation modal value.
To configure ViPNet Coordinator Linux in this musical mode, set the following parameters in the iplir.conf file :
- In the [id] section, set the usefirewall parameter to on .
- В собственной секции [id] установите параметр port в значение из диапазона 1-65535 (обычно 55777), если он еще не задан.
- В секции [adapter], соответствующей сетевому интерфейсу, со стороны которого установлен внешний межсетевой экран, установить параметр typewrite в значение external.
- В секции [dynamic] установите параметр dynamic_proxy в значение connected.
- В секции [energetic] установите параметр forward_id равным значению Idaho внешнего координатора для организации входящих соединений. Данный параметр задается вручную, но не может принимать нулевое значение.
Ahead editing the parameters, you call for to stop the VipNet Coordinator modules with the followers command:
Iplir stop
PS If you do not check, changes to the file will not constitute rescued.
The Iplir.conf fileis open only with superuser privileges. To run the file with superuser settings, I recommend running the Midnight Commander file manager in the terminal with superuser parameters. To start, run the pursuing mastery:
megacycle per second
The Midnight Сommander file coach launches. At any sentence, you canful understate the file manager to make for with the terminal to use the keyboard shortcuts clotting the Ctrl + About .
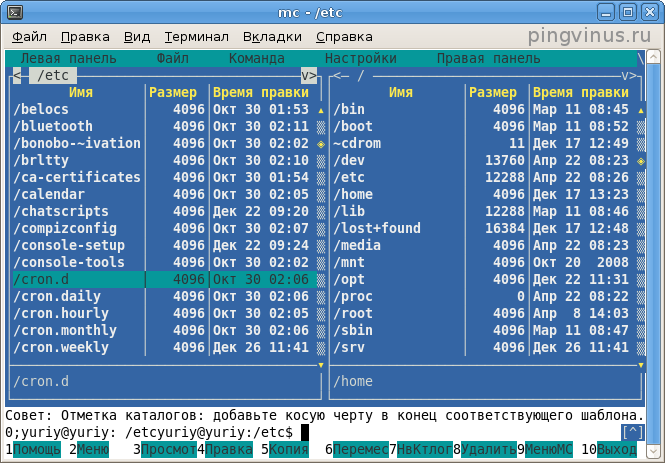
The Iplir.conf file is situated in the directory: etc / vipnet / drug user .
Open the Iplir.conf file in with the F4 key in the file manager and edit it according to the requirements. After editing, you should get something like the next:
Iplir.conf file content
[id]
Gem State= 0x099a0e10
name= APS2 id_******
filterdefault= pass
ip= 192.168.122.1
tunnel= 193.169.176.116-193.169.176.119 to 193.169.176.116-193.169.176.119
firewallip= 192.168.122.1
port wine= 55777
proxyid= 0x099a0e10
usefirewall= happening
fixfirewall= off
virtualip= 10.0.0.1
version= 3.0-670
[id]
id= 0xffffffff
name= Encrypted broadcasts
filterdefault= drop
filterudp= 137, 137, pass, any
filterudp= 138, 138, pop off, any
filterudp= 68, 67, pass, any
filterudp= 67, 68, pass, any, disable
filterudp= 2046, 0-65535, pass, recv
filterudp= 2046, 2046, pass, send
filterudp= 2048, 0-65535, pass, recv
filterudp= 2050, 0-65535, pass, recv
filterudp= 2050, 2050, pass, send
[id]
id= 0xfffffffe
name= Main Percolate
filterdefault= pass
[Idaho]
id= 0x099a000b
make= AP Administrator
filterdefault= pass
ip= 10.0.4.246
accessip= 10.0.0.2
firewallip= 10.0.4.245
port= 55777
proxyid= 0x099a000a
dynamic_timeout= 0
usefirewall= on
always_use_server= on
virtualip= 10.0.0.2
version= 3.2-672
[id]
id= 0x099a066d
name= CM Failover2
filterdefault= pass along
ip= 85.143.100.25
information processing= 10.0.4.242
ip= 169.254.241.1
ip= 192.168.0.1
accessip= 10.0.0.3
tunnel= 10.0.3.1-10.0.3.1 to 10.0.3.1-10.0.3.1
firewallip= 85.143.100.25
port= 55777
proxyid= 0x099a066d
dynamic_timeout= 0
usefirewall= connected
virtualip= 10.0.0.3
reading= 3.0-670
[id]
id= 0x0e18000a
name= CM-OBRNADZOR-HW-1 3608
filterdefault= pass
ip= 192.168.0.121
ip= 10.3.54.101
accessip= 10.0.0.4
tunnel= 10.3.54.15-10.3.54.15 to 10.3.54.15-10.3.54.15
firewallip= 62.76.166.101
port= 55777
proxyid= 0xfffffffe
dynamic_timeout= 0
usefirewall= happening
virtualip= 10.0.0.4
version= 3.0-670
[id]
id= 0x0e18000d
name= AP-Admin3608 3608
filterdefault= pass
accessip= 0.0.0.0
port= 55777
dynamic_timeout= 0
usefirewall= along
virtualip= 10.0.0.5
[adapter]
name= eth0
allowtraffic= on
character= external
[transcriber]
refer= virbr0
ip= 192.168.122.1
allowtraffic= on
type= internal
[high-octane]
dynamic_proxy= on
firewallip= 192.168.122.1
port= 32466
forward_id= 0x099a066d
always_use_server= off
timeout= 25
[misc]
packettype= 4.1
timediff= 7200
warnoldautosave= connected
client_pollinterval= 300
server_pollinterval= 900
iparponly= off
ifcheck_timeout= 30
ipforwarding= on
iscaggregate= on
ompnumthreads= 1
mssdecrease= 0
ciphertype= gost
[debug]
debuglevel= 3
debuglogfile= file cabinet:/var/logarithm/iplircfg.debug.log
[servers]
server= 0x099a066d, CM Failover2
server= 0x0e18000a, CM-OBRNADZOR-HW-1 3608
[virtualip]
startvirtualip= 10.0.0.1
endvirtualip= 10.0.0.6
maxvirtualip= 10.0.254.254
; Do non delete or change the following line!!!
startvirtualiphash= 0x18E80620
[visibility]
default= auto
At the end of redaction the single file, save information technology.
Coordinator Mode Switching
Next, we take to shift the way of the coordinator so that it does not block all packets in a run-in. Past default on, 2 fashion is set, it is Sir Thomas More self-abnegating. We put off it to mode 4 by editing the iplir.conf-eth0 file . IT is also placed in the directory: etc / vipnet / user .
The file contains the pursuit info:
The table of contents of the iplir.conf-eth0 file
[manner]
mode = 2
[db]
maxsize = 50 MBytes
timedif = 60
registerall = off
registerbroadcast = off
registertcpserverport = off
In the [musical mode] plane section, change the fashion = 2 parameter to mode = 4 , then save the changes to the file.
Next, run the Vipnet modules again:
Iplir begin
If the found is not made, in the future on that point wish personify no opportunity to receive updates on the coordinator.
Workstation connecter
Initially, we planned to configure this PAC as a gateway for exploiter workstations from which act upon will be performed in the FIS Unified State Examination and the FIS FRDO, so at this stage we involve to determine the routine of machines active in the work and assign them the following types of static IP addresses:
- 192.168.XX.XX;
- 172.16.XXX.xxx;
- The address range is from 10.1.xxx.xxx to 10.255.xxx.xxx.
IP addresses must be in agreement with the FTsT (they may be busy).
After coordination, you need to send away a letter with ip-addresses, and and then wait until updates arrive at the coordinator.
Updating Gateway Information
After processing the letter, the FTsT will send updates to the gateway, thanks to which workstations with assigned IP addresses will be able to access the FIS Unified Put forward Examination and the FIS FRDO. You can check whether updates have arrived or not by checking the Iplir.config filing cabinet .
In the custom part [id] , extra tunnel parameters will look with a inclination of assigned informatics addresses.
Example ahead update:
The contents of the iplir.conf register before the update
[I.D.]
id = 0x099a0e10
name = APS2 id _ *****
filterdefault = travel by
ip = 192.168.122.1
tunnel = 193.169.176.116-193.169.176.119 to 193.169.176.116-193.169.176.119
firewallip = 192.168.122.1
porthole = 55777
proxyid = 0x099a0e10
usefirewall = on
fixfirewall = inactive
virtualip = 10.0.0.1
reading = 3.0-670
Example after update:
The table of contents of the iplir.conf file aft the update
[id]
id = 0x099a0e10
name = APS2 id _ *****
filterdefault = slip away
ip = 192.168.122.1
burrow = 193.169.176.116-193.169.176.119 to 193.169.176.116-193.169.176.119
tunnel = 192.168.xxx.30
tunnel = 172.16 .xxx.xxx
tunnel = 10.1.xxx.XX
firewallip = 192.168.122.1
port wine = 55777
proxyid = 0x099a0e10
usefirewall = on
fixfirewall = sour
virtualip = 10.0.0.1
variation = 3.0-670
Commission
After all the settings and updates, you can put across the gateway into operation. In order for the FIS Coordinated State Test and FIS FRDO portals to work on user workstations, it is necessary to specify the IP address of the PAK aside the gateway in the network settings. In govern to find unfashionable the IP address of the PAK, enter the command in the terminal:
ifconfig
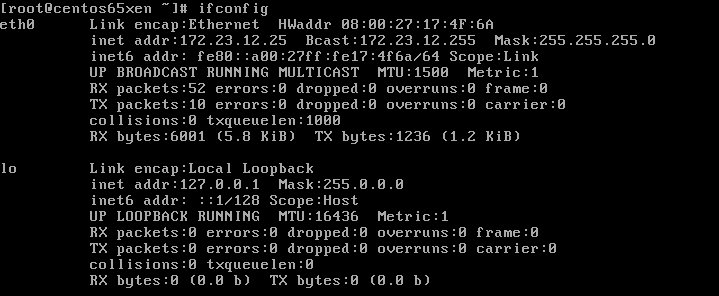
By default, if there is only one network interface, the local network is designated as eth0, the IP speech of the gateway will be registered in the inet addr parametric quantity.
After entering the gateway at workstations, we check the operability of the VPN network we organized. To stoppage in the Explorer browser, enter the address of the portal FIS Unified State Examination - 10.0.3.1 and FIS FRDO - 10.3.54.15. If the portals open successfully, then all the actions are performed correctly. If the portals are unavailable and there is no Internet accession generally, we go again to the gateway and check the packet flow.
Packet boat inspection
To check packages, you need to enter the command in the terminal with superuser rights:
Iplir view
Then press "Enter" . Information will be displayed connected the arrival of packets to the gateway from machines connected to this network.
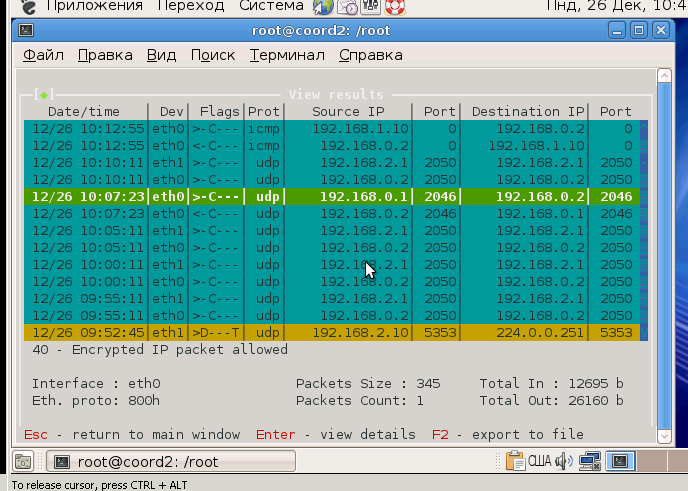
Condition packets from Informatics addresses of workstations; if there is data about block packets, you require to configure packet forwarding from specific IP addresses.
Promotion Settings
If after installing the gateway to the network from user workstations it is not possible to enter the FIS EGE and FIS FRDO portals, you must configure packet forwarding. To configure forwarding, you need to edit the firewall.conf file .
In the [forward] parameter, you need to add several rules with assigned Information processing addresses, for example:
Forwarding Rules
rule = proto any from 172.16.xxx.xxx to any pass
rule = early any from 192.168.XXX.cardinal to any drop dead
rule = proto any from 10.1.xxx.XX to whatever pass
rule = proto any from 10.255.xxx.xxx to any pass
If after scope up the forwarding one of the two portals does not work, and one with success loads, then the second operator has not notwithstandin processed the information sent from the FTsT and does not know the Information processing addresses of user workstations. In that case, you can check and demonstrate access to both portals from the gateway itself.
Hotkeys
In my guinea pig, experience with Linux systems was minimal, and when setting up the gateway for the customer, I was puzzled by the selection of hot keys for launching applications, because the mouse was missing. Hence, I advocate mastering the main Linux hotkeys. I needed the following:
- Ctrl + O - Crash / get ahead the file manager;
- Altitude + F1 - Gap the scheme menu;
- Ctrl + Q - Exit the application;
- Ctrl + T - New tab in the web browser;
- F10 - Application Menu;
- F11 - Expand Full Silver screen.
Sources used
1. Alt Linux Wiki - World Wide Web.altlinux.org
2. InfoTeCS Forum - www.infotecs.ru/forum
3. VipNet Coordinator Linux Executive Guide - files.infotecs.ru/_dl/sess/vipnet_coordinator_linux/docs/ViPNet_Coordinator_Linux_docs.nada
4 Google Search Railway locomotive - www.google.com
5. BRAIN!
DOWNLOAD HERE
GET Instructions: Configuring the Gateway PDN PAK (AltLinux SPT 6.0 + VipNet Coordinator) / Sudo Null IT News FREE
Posted by: weirnonsts.blogspot.com
0 Response to "GET Instructions: Configuring the Gateway PDN PAK (AltLinux SPT 6.0 + VipNet Coordinator) / Sudo Null IT News FREE"
Post a Comment